If you’re a digital marketer or digital analyst, and you want to implement analytics and marketing code much faster, for example, Google Analytics then Google Tag Manager is exactly what you need.
What is Google Tag Manager?
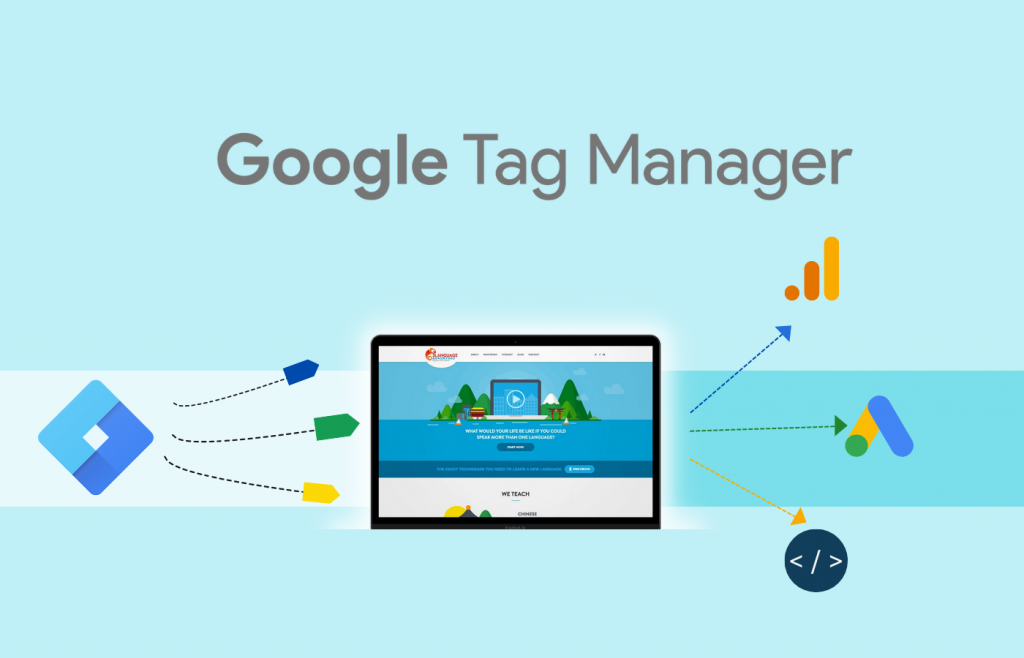
Let us understand Google Tag Manager (GTM) with an example. Consider a company which has multiple websites. In order to measure the effectiveness of those websites and how they contribute to the overall goal of the business; the company usually may use tools like Google Analytics, or Google Ads Conversion Tracker, etc. And that’s where you as a marketer or analyst will be using those tools and in order to get some data from Google Analytics, you need to add tracking codes to those websites. Hence, Google Tag Manager lets you manage all of your marketing and analytics tags in one place. It acts as a layer between your website and the different platforms you’re using. It also allows you to streamline the management of the different tags.
How does Google Tag Manager (GTM) work?
An analyst might want to add a Google Analytics tag to all of the pages of the website and then may decide to add a Google Ads Conversion tag and a Facebook Pixel to an individual thankyou page. The analyst may add the Google Analytics tag in the website’s template and then add Google Ads Tag and Facebook Event tag to the specific page. However, this will quickly become difficult to manage and it’s easy to lose track of where tags have been installed. With Google Tag Manager (GTM), we add one piece of code to all the pages on the website, called the container. Then configure Google Tag Manager to fire tags on particular pages or for a particular action.
Important Terminologies to know in Google Tag Manager
Tags
Tag is a piece of javascript code. They typically collect data and then send it to a particular platform like a Google Analytics tag which collects information about the people viewing our website or we can also use a tag to add additional functionality to our website. For example, you could use a tag to add a social sharing widget to your blog or you could use the Google optimize tag to personalize the content people see on your website.
Triggers
Triggers let you control when a tag should or shouldn’t fire on your website. For example, you could use the built-in all-page trigger to add a tag to every page of your website. And you can also create your own triggers such as you may want to track people clicking the latest announcement banner featured at the top of the homepage or maybe you want to fire a specific tag on a Thankyou Page. You can do so by creating triggers for your tags.
Variables
Variables are placeholders for information that you can use in Google Tag Manager. For example, you might want to capture details about a link someone has clicked on your website. You can then use this information in your tag’s triggers and even other variables. There is a range of built-in variables that lets you access information automatically and you can also create custom variables and then you have your container storing all of the tags, triggers, and variables for your website.
Data Layer
Tags require information as to what and when exactly they need to be fired. The data layer feature in GTM relays this information to the tags to know what needs to be fired when. The data layer is a javascript that conveys information from the website to the container. This information can then be used to determine the variable values and generate triggers.
How to add Google Tag Manager to your website?
Step 1: To add GTM to your website, you first have to create a Google Tag Manager account. Just like any other Google product, you use the same Google account for GTM. If you don’t have a Google Account, you will have to create one.
Step 2: Once you log in, you will be asked to create a new GTM account and set up a container.
Note: A single container can contain many tags, triggers, and variables. So, in case there are several websites that belong to a single business and their structure is quite similar, you can still use one container on multiple websites.
The following image illustrates the details one needs to enter in order to create an account.

Step 3: Once you have created a GTM account and set up a container, you will get two codes that need to be added to the website. There are different ways you can add the container code depending on how you’ve created your website. For example, if you’re using WordPress, then you can use a plugin to add the container to all of your pages. In case your website was created by a developer, you might have to pass on this code to the developer.
Among the two pieces of codes, the first one is the most important. This is the javascript container code and you need to add this to all of the pages of your website. This code should be placed inside the head tag on your website and ideally should be one of the first things in your head tag.
The second piece of code is the no-script version of the container. This will load if someone has javascript disabled. Since almost all the tags we use in GTM are javascript, this won’t improve the accuracy of the data we collect so if you can’t add this extra no-script code to your website, it won’t have a major impact.
Note: Once you create a new container for your website in GTM, you have to publish it or else something called Preview Mode will not work. This step should be taken each time you add, modify and delete tags in GTM. By clicking on the Preview Mode, you get detailed information about the tags, triggers, and other components of a google tag manager.
Step 4: Googe Tag manager dashboard will open wherein you need to click on the ‘Add a new tag’. Here you can name and arrange all the required tags like form submission, contact us, page clicks, etc that need to be triggered.
The benefits of Google Tag Manager (GTM)
Easy to use
With Google Tag Manager you can easily make updates, add new tags, assess change, and deploy tags without any complex coding knowledge. This is one of the most important benefits of Google Tag Manager as a programming language is not required.
Saves Time and Money
As anybody with no experience can use Google Tag Manager there is no need for the marketer to send the code to a developer and get it installed. That’s why Google Tag Manager helps to save a lot of time and also it is completely free to use. However, there are premium versions of it but the free version of Google Tag Manager is more than enough for small and medium businesses.
Control Multiple Codes
As different types of tracking codes can be stored, edited, and managed in one place in Google Tag Manager, there is no room for missing out on any tracking codes.
Easily Debug Features
This means to easily identify and correct any issues in the tag features. As Google Tag Manager has everything in one place, it is easy to troubleshoot or correct any errors in the tag features.
Automatically Track Events
Google Tag Manager has a feature that instantly tracks the events automatically like clicks, time spent on each page, and so on without the usage of programming codes. However, it requires some setup to be made and once the triggers have been enabled, Google Tag Manager will automatically track the website’s activities.